
Having scratches on your car’s paintwork can be frustrating and can diminish its overall appearance.
However, if you have the appropriate information and methods, you can get rid of those unattractive scratches and restore the shine to your automobile.
We will walk you through the paint correction procedure and provide helpful advice so you can get a smooth, perfect finish.
Understanding Different Types of Scratches
When addressing scratches on your car’s paintwork, you must understand the types of scratches you may encounter.
By identifying the specific type of scratch, you can choose the appropriate technique and products to correct the problem effectively. Let’s explore the three main types of scratches and how they differ:
Surface-level scratches
These shallow scratches only affect the clear coat, the topmost layer of protective paint on your car’s surface.
They are typically caused by light contact with objects like tree branches, fingernails, or keys. Surface-level scratches are relatively easy to address and can often be buffed out with simple techniques.

Deep scratches
These scratches are the most severe and penetrate through the clear coat and base color layer, reaching the car’s primer or even metal body.
Accidents, collisions, or deliberate vandalism can cause deep scratches. Repairing deep scratches typically involves a more complex process, including touch-up paint application, sanding, and professional assistance in some cases.

Gathering the Right Tools and Materials
Before you begin the paint correction process to remove scratches from your car, gathering the right tools and materials is essential.
The correct equipment will ensure you can perform the necessary steps effectively and achieve the best possible results. Here are some essential tools and materials you will need:
Microfiber cloths
These soft, non-abrasive cloths are ideal for cleaning and buffing your car’s surface. Microfiber cloths are gentle and won’t leave scratches or swirl marks.
Car wash soap
Make use of a premium vehicle wash soap that is made with automotive paint in mind. Avoid dish soap or household cleaners; they can be too harsh and strip away wax or protective coatings.
Clay bar
A clay bar removes embedded contaminants such as dirt, tar, or overspray from the paint’s surface. It creates a smooth base for the correction process. To stop the clay from clinging to the paint, use a clay bar lubricant or detailing spray.
Compound or polish
These products are designed to remove scratches, swirl marks, and other imperfections from the paint’s surface. Compounds are more aggressive and suitable for deeper scratches, while polishes are milder and ideal for light scratches or restoring shine.
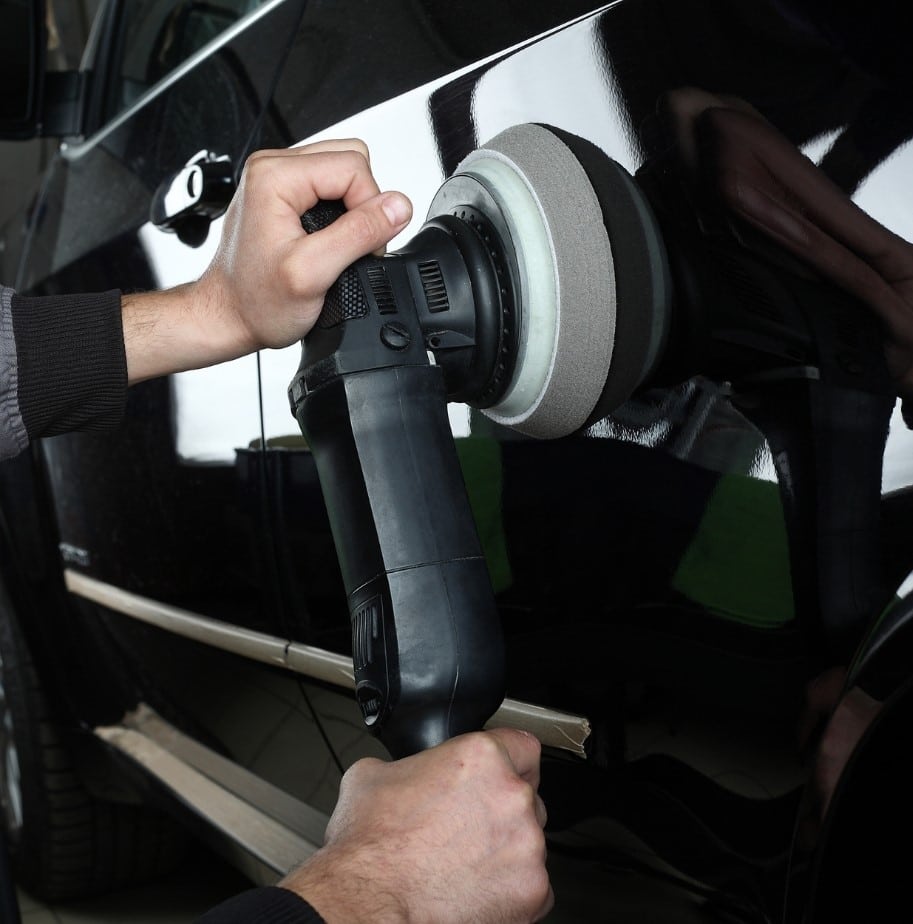
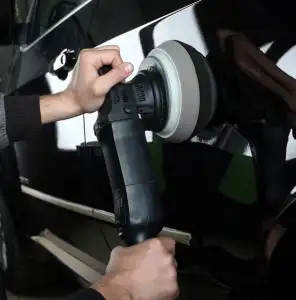
Dual-action polisher (optional)
A dual-action polisher can make the correction process more efficient and effective. It helps to distribute the compound or polish evenly and provides consistent pressure.
If you use a polisher, ensure you have the appropriate foam pads for different correction levels.
Wax or sealant
After correcting the scratches, it’s essential to protect the paintwork by applying a wax or sealant layer.
These products provide a protective barrier against UV rays, dirt, and contaminants, enhancing the shine of your car’s finish.
Preparing Your Car for Paint Correction
Before diving into the paint correction process to remove scratches from your car, it’s crucial to prepare the vehicle’s surface properly.
Adequate preparation ensures a clean and smooth canvas, allowing for better results and reducing the risk of further damage. To get your automobile ready for paint repair, follow these steps:
Wash and dry the car
Start thoroughly washing your car using a high-quality soap and a microfiber mitt or sponge.
This step removes surface dirt, grime, and contaminants that could interfere with the correction process. Rinse the car thoroughly and use a microfiber towel or a drying cloth to dry it thoroughly.
Inspect the paint
Examine the blemishes or scratched areas more closely. Verify that there are no stray pieces of debris, wax, or dirt on the surface.
If necessary, use a detailing spray or isopropyl alcohol to clean those areas and remove any remaining contaminants.
Decontaminate the paint with a clay bar.
Even after washing, there may be embedded contaminants on the paint’s surface, such as tar, tree sap, or overspray. To eliminate these impurities, use a clay bar lubricated with a clay bar detailing spray.
Gently glide the clay bar over the paint, applying light pressure. This process helps smoothen the surface and remove any remaining contaminants, providing a clean foundation for paint correction.
Mask off sensitive areas (optional)
If you’re using a machine polisher or working near delicate surfaces like plastic trim or rubber seals, consider masking them off with painter’s tape.
This precautionary measure helps protect these areas from accidental contact with compounds or polish.
Correcting Surface-level Scratches
Correcting surface-level scratches on your car’s paintwork can often be straightforward. Here’s a step-by-step guide to help you effectively address those shallow scratches:
Clean the area
Ensure the scratched area is clean and free from dirt or debris. Use a microfiber cloth and mild car wash soap to wash the affected area gently. Rinse it completely, then use a soft towel to pat it dry.
Apply a small amount of compound or polish.
You can start with a mild abrasive compound or polish for surface-level scratches. Apply a small amount of the product directly on a foam or microfiber applicator pad.
Buff the affected area.
Using light to moderate pressure, work the compound or polish into the scratched area in a circular motion.
Start with small sections simultaneously, applying even pressure and overlapping each pass. Continue buffing until the scratch begins to fade or is no longer visible.
Evaluate the results
After buffing, remove any residue with a clean microfiber cloth and inspect the area. Repeat the procedure, adding a little more compound or polish as necessary if the scratch is still visible.
Be patient and avoid excessive pressure or prolonged buffing, as it can damage the paint.
Final touch
Clean the area with a microfiber cloth to get rid of any leftover residue until the scratch is no longer noticeable.
You can follow up with a quick detail spray or a gentle car wash to ensure the surface is clean and ready for further protection.
Addressing Clear Coat Scratches
Clear coat scratches penetrate deeper into the clear coat layer of your car’s paintwork and may require additional steps to address effectively. A step-by-step manual on removing clear coat scratches is provided below:
Clean the area
Clean the scratched area using a mild car wash soap and a microfiber cloth. Before continuing, thoroughly clean and dry the area.
Assess the severity
Evaluate the depth and severity of the clear coat scratches. You can proceed with a mild abrasive compound or polish if they are relatively minor.
You may need a dual-action polisher with a more aggressive compound for more profound or noticeable scratches.
Choose a suitable compound or polish.
Select a compound or polish formulated explicitly for clear coat scratches. Read the product instructions and ensure it’s suitable for the severity of the scratches you’re dealing with. Apply a small amount of the product to the pad using a foam or microfiber applicator pad.
Polish the scratched area.
Using the compound or polish, work the product into the scratched area using a dual-action polisher or by hand. If using a dual-action polisher, set it to a low or medium-speed setting.
Apply moderate pressure and work in overlapping circular motions. If working by hand, use firm pressure and continue buffing until the scratches begin to fade or blend in.
Evaluate the results
After polishing, remove any residue with a clean microfiber cloth and inspect the area. Check if the scratches have significantly improved or disappeared.
Repeat the polishing process, gradually increasing the pressure or switching to a more aggressive compound. Keep in mind that excessive pressure or polishing might thin the clear coat.
Final touch
Once the scratches are minimized or removed, with a microfiber cloth and a light vehicle wash or fast detail spray, clean the area. This will remove any remaining residue and ensure the surface is clean.
Apply a protective layer.
After addressing the clear coat scratches, applying a layer of wax or sealant is essential to protect the newly corrected area and the surrounding paint. For the particular product you choose, adhere to the manufacturer’s directions.
Dealing with Deep Scratches
Deep scratches on your car’s paintwork require special attention and may necessitate more extensive repair techniques. Here’s a step-by-step guide to help you address deep scratches effectively:
Assess the depth and severity
Examine the deep scratches to determine their extent. If the scratch has penetrated through the clear coat and base color layer, exposing the primer or metal body, it may require professional assistance for proper repair.
However, for minor deep scratches that have not reached the metal, you can attempt to address them yourself.
Clean the area
Before proceeding with any repair, clean the scratched area using a mild car wash soap and a microfiber cloth. Rinse and dry the area thoroughly.
Sand the scratch (if necessary)
If there are significant scratches, you may need to sand the area to level it with the surrounding paint. Use wet sandpaper with a grit appropriate for the depth of the scratch.
Begin with a higher grit (around 800 or 1000) and gradually move to finer grits (1500 or 2000) to smoothen the surface. Remember to keep the sandpaper and the area wet during sanding to avoid further damage.
Apply touch-up paint
If the deep scratch has exposed the primer or base layer, you need touch-up paint matching your car’s color.
Follow the manufacturer’s instructions to apply the touch-up paint precisely to the scratched area.
Use a small brush or a fine-tipped applicator for better control. Give the paint the necessary amount of time to dry fully.
Blend the touch-up paint.
After the touch-up paint has dried, you may need to blend it with the surrounding paint. Wet sand the painted area using very fine grit sandpaper (2000 or higher) until it is even and smooth with the surrounding surface. Take caution to avoid sanding too aggressively and causing damage.
Polish and buff the area
Use a mild abrasive compound or polish to refine the repaired area further. Using a foam or microfiber applicator pad, gently polish the area in circular strokes.
Gradually increase the pressure until the repaired area blends seamlessly with the surrounding paint.
Protect the repaired area.
After addressing the deep scratches, protecting the repaired area with a layer of wax or sealant is crucial.
Apply the product following the manufacturer’s instructions to ensure long-lasting protection.
Conclusion
Following the steps outlined in this paint correction guide, you can take control of your car’s appearance and eliminate those annoying scratches.
Remember to exercise patience and caution throughout the process, as rushing can lead to further damage.
With the right tools, techniques, and maintenance, your car will regain its glossy finish and turn heads wherever you go.
So, roll up your sleeves, grab your supplies, and say goodbye to scratches on your beloved vehicle.